Page 1 of 2
Braided paper - Pleat sink?
Posted: February 25th, 2006, 4:36 am
by Aleburzyn
Hello everyone, I´ve two questions:
1-someone knows how to fold correctly step 8 of Braided Paper (diagram in
http://www.origami.com)?
2-What´s technically a pleat sink? I thought it was that sink where you keep part of the top of the point without sinking (well, if you´re sinking a point), but that one doesn´t appear to be what the diagram is asking for.
Posted: February 25th, 2006, 1:09 pm
by EuanBingham
Looks like you just do four reverse folds, one for each point.
Euan
Posted: February 26th, 2006, 12:07 am
by Aznman
Actually these are not reverse folds, but sink folds. Step seven is a reverse, then you just triangularly sink the flap in half.
Posted: May 21st, 2006, 6:02 am
by rokonacdc
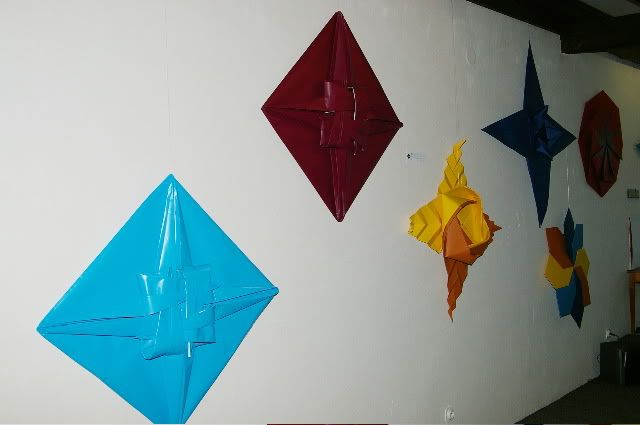
can someone please post a pic of a finished braided paper model
Posted: May 21st, 2006, 10:36 am
by Daydreamer
Posted: May 21st, 2006, 3:39 pm
by rokonacdc
i can not figure out step8 still can someone please help

Posted: May 21st, 2006, 6:15 pm
by gila o
I ignored step 8.
I've done step 7 that is a reverse fold in the inner flaps
(as shown in x-r )and then done step 9 and it was o.k.
I've tried to take photo but it is hurd to take photo of the inner flap.
I hope it helps .If not I 'll try to eplain in a private mesage or with photos.
Posted: May 21st, 2006, 6:18 pm
by rokonacdc
i have already made 2 models skipping step8 but i would like to do the model correctly
Posted: May 21st, 2006, 7:06 pm
by gila o
To tell you the truth -until now I didn't mind to fold the model not correctly but now you gave me a challenge....I am working on it .If I'll succid I'll post the photo.
Posted: May 21st, 2006, 8:05 pm
by gila o
The corect model Iv'e done-

Ater step 7 when you done reverse fold you have to fold again the inner flap to half.to open the last fold and to open also the first reverse fold .Now you have to do 3 alternate reverse fold and this 3 reverse fold are the pleat sink in step 8.
this is the photo of the pleat sink

I hope that now I realy helped.
Posted: May 21st, 2006, 9:44 pm
by rokonacdc
yes u did help thank u very much and im glad i persuaded u to fold the model correctly
Posted: May 23rd, 2006, 8:33 am
by Ondrej.Cibulka
Posted: May 23rd, 2006, 12:33 pm
by rokonacdc
OMG i would hate to have done the sinking and reversefolding on those
Posted: February 5th, 2011, 5:38 pm
by Foldalot
Could somebody upload the images explaining step 8 in this model again?
They are down.
http://dev.origami.com/images_pdf/braided.pdf
Thanks in advance.
Posted: February 5th, 2011, 10:59 pm
by Brimstone
If you did step 7 correctly, step 8 shouldn't be much of a problem. Just sink again, only this time it is a shorter area since the flap was shortened in step 7.


